
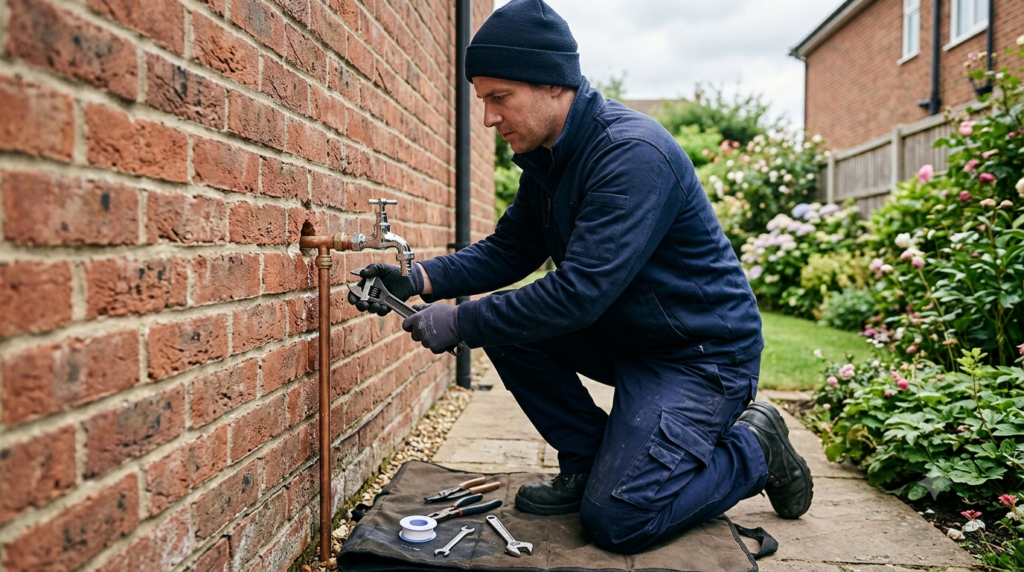
A garden tap doesn’t get much attention until the day it stops working. Then, suddenly, it’s the most important fitting in the house — because without it, there’s no hose for the car, no water for the plants, and no quick rinse for muddy boots.
Getting the plumbing and fittings right for an outdoor tap isn’t complicated, but it does matter. The wrong fitting, a poor installation, or a few skipped maintenance steps in winter can turn a simple convenience into a burst pipe and a hefty repair bill.
In this guide, the team at Catalyst Home Services breaks down everything you need to know about garden taps — why they matter, the different types available, how they’re installed properly, how to maintain them, and the most common issues London homeowners run into. We repair, replace, and install outdoor taps across London every week, so this is knowledge built from hands-on experience, not just theory.
Why Garden Taps Matter More Than You Think
It’s easy to think of a garden tap as a minor convenience. In practice, it’s a small but essential piece of your home’s plumbing and fittings network, and it earns its place for a few clear reasons.
It saves you carrying water through the house. Without an outdoor tap, every watering can, bucket, or hose fill means trailing water through the kitchen. A properly fitted garden tap solves that instantly.
It supports the rest of your property maintenance. Washing the car, cleaning patios and decking, filling ponds or water butts, and watering greenhouses or allotments all depend on reliable outdoor water access.
It protects your indoor plumbing. A dedicated outdoor tap, especially one fitted with its own isolation valve, means you’re not running hoses off indoor fittings not designed for that kind of use — which reduces wear on your internal pipework.
It adds practical value to your home. Buyers and tenants notice small details. A working, well-installed garden tap is one of those quiet signals that a property has been properly looked after.
The flip side is that garden taps are also one of the most exposed parts of your plumbing system. They sit outside, face the weather year-round, and are usually the first fitting to suffer when temperatures drop. That’s exactly why understanding the basics of plumbing and fittings for outdoor taps is worth ten minutes of anyone’s time.
Types of Garden Taps and Fittings
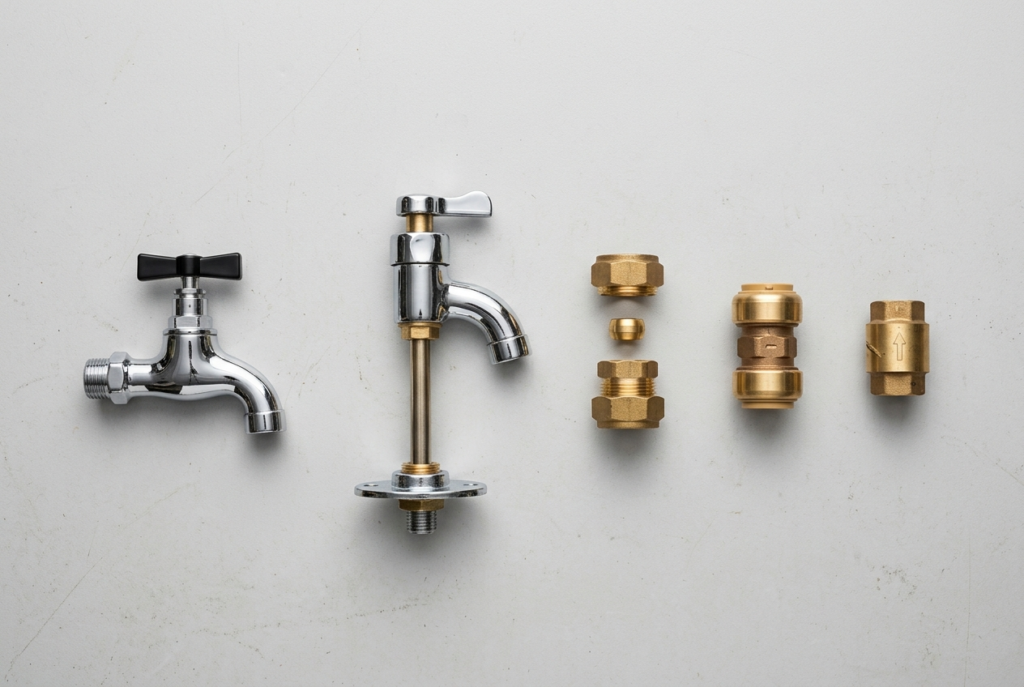
Not all outdoor taps are built the same way, and choosing the right type makes a real difference to how long it lasts. Here are the main options you’ll come across.
Standard Bib Taps
This is the classic outdoor tap most UK homes have — a simple, sturdy fitting with a hose connector thread on the end. Bib taps are durable and inexpensive, but on their own they offer no frost protection, which is why they’re almost always paired with an indoor isolation valve.
Self-Closing (Spring-Loaded) Taps
These taps shut off automatically when you let go of the handle, rather than staying open until manually turned. They’re popular in shared gardens, allotments, and commercial settings because they prevent water being left running by accident.
Frost-Proof (Wall-Mounted) Taps
A frost-proof tap has its valve mechanism set further back inside the wall, so the part that holds water sits in a warmer zone rather than right at the surface where freezing is most likely. These are a smart upgrade for anyone who has had a tap split in a previous cold spell.
Push-Fit and Compression Fittings
These describe how the tap connects to the supply pipe rather than the tap itself. Push-fit fittings are quick to install and popular with plastic pipe systems, while compression fittings use a tightened nut and olive to create a watertight seal — generally considered the more robust option for outdoor use where the joint will face the elements.
Double-Check Valve Taps
Many UK water suppliers now require a double-check valve on outdoor taps to prevent contaminated water being drawn back into the mains supply — particularly important if you connect a hose for filling things like fish ponds or using chemical feeders. It’s a small fitting that makes a genuine difference to water safety.
Installation Tips: Getting the Plumbing and Fittings Right
A garden tap installation looks simple from the outside, but the details around the plumbing and fittings are exactly where things go wrong if rushed. Here’s what a proper job involves.
1. Choose the right location. The tap should sit at a sensible working height, ideally above where you’ll want to position a bucket or hose reel, and on a wall that gives easy access to the internal pipe run.
2. Fit an internal isolation valve. This is the single most important step. A dedicated shut-off valve inside the house, separate from your main stopcock, allows you to drain and isolate the outdoor tap completely before winter — without affecting water supply to the rest of the home.
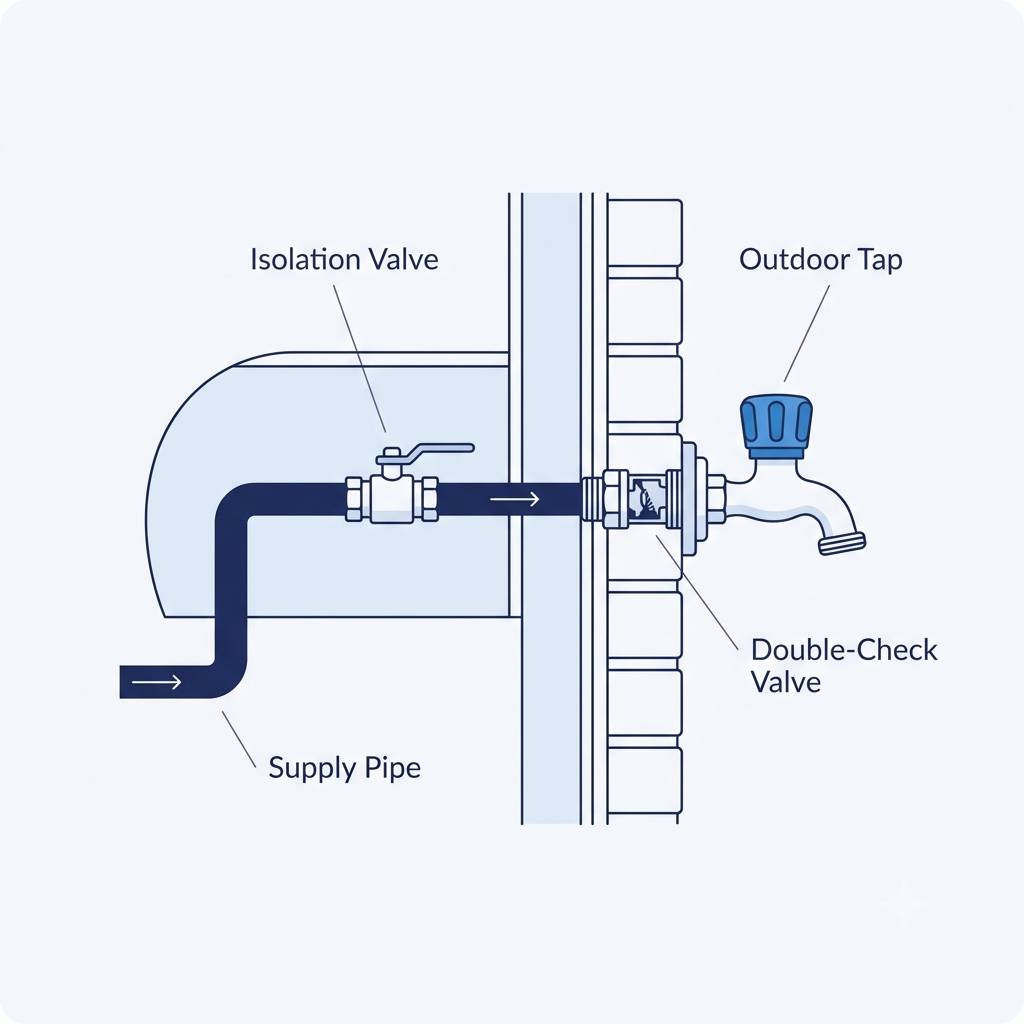
3. Use a self-draining or frost-resistant tap where possible. Self-draining taps allow any residual water in the pipe to clear after the isolation valve is shut, which removes the standing water that causes frost damage in the first place.
4. Get the pipe fall right. The supply pipe running out to the tap should have a slight downward slope toward the outlet, so it drains by gravity once isolated rather than trapping water inside.
5. Secure the tap properly to the wall. A garden tap takes regular knocks from hoses, watering cans, and general garden activity. It needs a solid wall-mounted backplate, not just a pipe holding it in place, or the joint will eventually work loose.
6. Check local water regulations. In the UK, outdoor tap installations connected to the mains typically require a double-check valve under water supply byelaws. It’s a quick addition, but it’s one that’s often missed on DIY jobs.
Get these basics wrong, and even a brand-new tap can fail within its first winter. Get them right, and a well-fitted outdoor tap will give years of trouble-free use.
If you’re planning a new installation as part of wider work — a new patio, an extension, or a garden redesign — it’s worth having it looked at alongside any new build plumbing you have planned, so the outdoor supply is integrated properly from the start rather than added as an afterthought.
Maintaining Your Garden Tap Through the Seasons
Maintenance is where most garden tap problems are either prevented or created. A few minutes of seasonal attention saves a lot of hassle later.
Before Winter
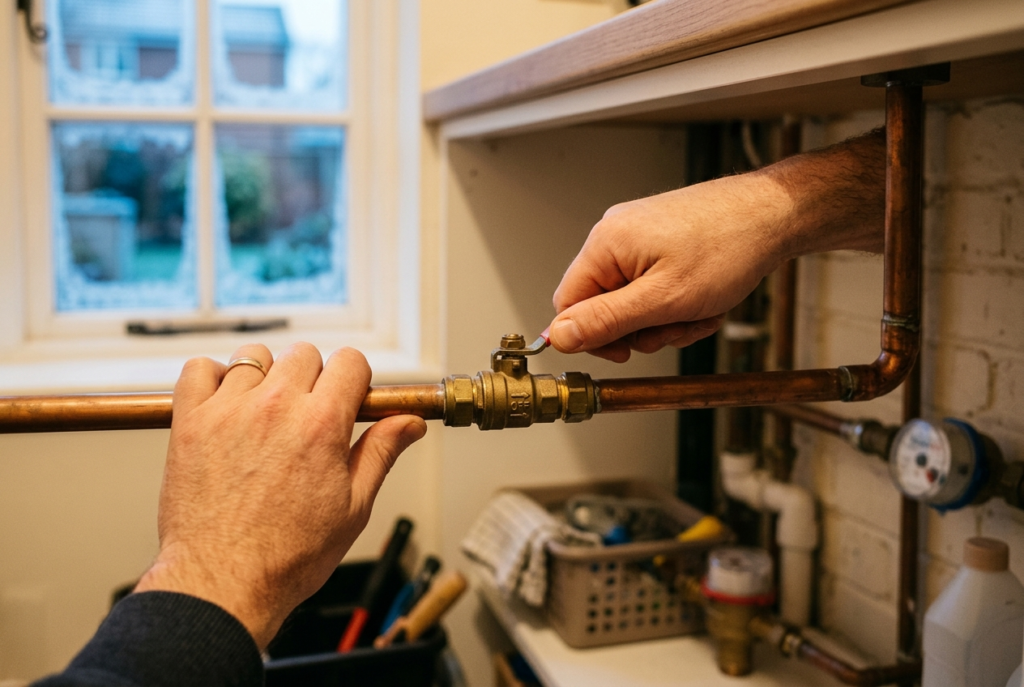
This is the maintenance step that matters most. Shut off the internal isolation valve, open the outdoor tap fully to let any trapped water drain and run off, and leave the tap open over winter so any water that does collect has somewhere to expand without splitting the fitting. Disconnect hoses, drain them fully, and store them away rather than leaving them attached to the tap.
During Spring and Summer
Check the tap for drips or slow leaks once the weather warms up and the system is back in regular use — this is often when small faults that developed over winter first become noticeable. Clean the hose connector threads of any dirt or debris, and check that the isolation valve still turns smoothly.
Through Autumn
Before the first proper cold spell, repeat the winter shut-off process. It’s worth doing this earlier rather than later — the first overnight frost of the year often arrives before people expect it.
Year-Round Habits
Avoid leaving a hose connected and pressurised against the tap for long periods, as this puts ongoing strain on the connector and seals. If your property has hard water, which is common across much of London and the South East, keep an eye out for limescale build-up around the spout and handle, as this can eventually affect how smoothly the tap operates.
Common Garden Tap Issues (And What They Usually Mean)
Most outdoor tap problems fall into a handful of recognisable patterns. Here’s what we see most often on callouts across London.
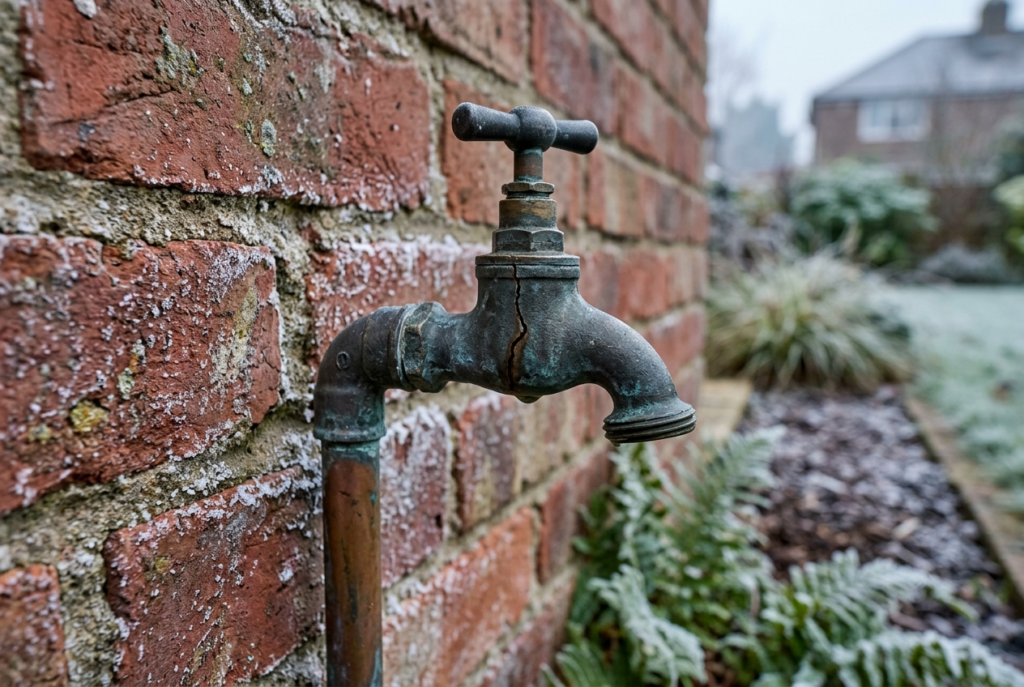
A tap that won’t turn off, or drips constantly. Usually a worn washer or a failing valve mechanism inside the tap body — the same underlying fault as an indoor dripping tap, just exposed to harsher conditions outdoors.
A cracked or split tap body after winter. This is the classic sign of frost damage — water left standing inside the tap or pipe froze, expanded, and cracked the fitting. It almost always means the isolation valve wasn’t shut off and drained properly before cold weather hit.
Water leaking from the wall behind the tap. This points to a failed joint or compression fitting where the pipe meets the tap, or a crack further along the supply pipe. It’s worth getting this checked quickly, since water running behind a wall can cause damp problems if left unaddressed — our leak detection and repair team deals with exactly this kind of hidden leak.
Reduced flow or a trickle instead of a steady stream. Often caused by limescale build-up inside the tap or a partially closed isolation valve. Occasionally it’s linked to a broader water pressure issue affecting the property as a whole.
The tap handle is stiff or won’t turn. Usually limescale or general wear inside the mechanism. Forcing a stiff handle is a common way to snap it, so it’s worth having this looked at before it gets worse.
No water at the tap at all. Check first whether the internal isolation valve has been left shut off, particularly if this is the first use after winter. If the valve is open and there’s still no flow, there may be a blockage or a fault further along the supply pipe.
A garden tap that’s behaving oddly is also sometimes the first visible sign of a problem elsewhere in the system, particularly if a burst or damaged section of pipe is feeding it. Catching it early tends to be a lot cheaper than catching it late.
DIY Fix or Call a Plumber?
A confident DIYer can usually manage basic seasonal maintenance — shutting off the isolation valve, draining the line, and disconnecting hoses for winter. Replacing a worn washer on a straightforward bib tap is also within reach for many people.
Where it’s worth calling a professional is anywhere the plumbing and fittings go beyond the tap itself: a new installation that needs to meet UK water regulations, a cracked tap body that needs replacing along with the connecting pipework, a leak behind a wall, or any job where you’re not confident the isolation valve and pipe run are correctly set up. Getting these details wrong doesn’t just risk a leak — in cold weather, it risks a burst pipe and far more significant water damage.
Why Choose Catalyst Home Services for Garden Tap Plumbing and Fittings
Catalyst Home Services has handled outdoor tap installations, repairs, and seasonal fixes across London for years, and a few things set the work apart.
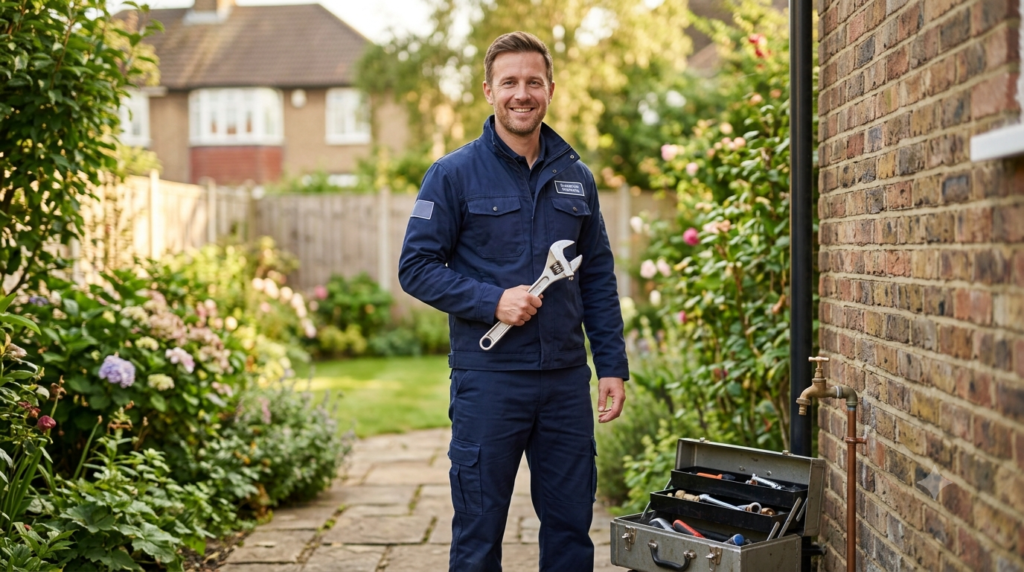
Qualified, experienced engineers. Every job is carried out by a properly trained plumber who understands both the tap itself and the wider plumbing and fittings it connects to. You can review our licences and certifications before booking.
Honest, transparent pricing. You’ll always get a clear quote before work starts — no vague call-out charges and no surprises on the invoice.
Fast response when it matters. A cracked garden tap or a leak behind a wall doesn’t always wait for a convenient time. Our 24/7 emergency line is there for exactly those moments.
London-wide coverage. From new installations to winter-readiness checks, we cover residential properties across London. Take a look at our full service areas to confirm we cover your postcode.
A long-term view on maintenance. If you’d rather not think about seasonal shut-offs and checks yourself, our Residential AMC plans include this kind of routine plumbing care as part of a wider annual maintenance schedule.
FAQs
What’s the best type of tap for an outdoor garden supply?
For most UK homes, a frost-proof wall-mounted tap paired with an internal isolation valve is the most reliable long-term option. A standard bib tap works perfectly well too, provided it’s properly isolated and drained before winter each year.
Do I need a double-check valve on my garden tap?
In most cases, yes. UK water supply regulations generally require a double-check valve on outdoor taps connected to the mains, to prevent contaminated water being drawn back into the supply. It’s a small, inexpensive fitting that’s straightforward to add during installation.
How do I stop my garden tap from freezing in winter?
Shut off the internal isolation valve, open the outdoor tap fully to let it drain completely, and leave it open over the cold months. This removes the standing water that causes frost damage. Disconnect and drain any hoses too.
Why has my garden tap split or cracked?
This is almost always frost damage from water left trapped in the tap or pipe over winter. Freezing water expands and cracks the fitting from the inside. It’s a strong sign the isolation and drain-down process wasn’t followed before cold weather arrived.
Can I install a garden tap myself?
Basic maintenance is manageable for most homeowners, but a new installation involves pipework, isolation valves, and UK water regulation requirements that are easy to get wrong. A poorly installed tap is far more likely to leak or fail in winter, so it’s generally worth having it fitted professionally.
Get Your Garden Tap Sorted Today
Whether you need a brand-new outdoor tap fitted, a winter-damaged fitting repaired, or a quick health check before the next cold spell, getting the plumbing and fittings right the first time saves money and hassle down the line.
Call Catalyst Home Services on +44 7400 265421, or book a plumber online and we’ll confirm your appointment straight away.