
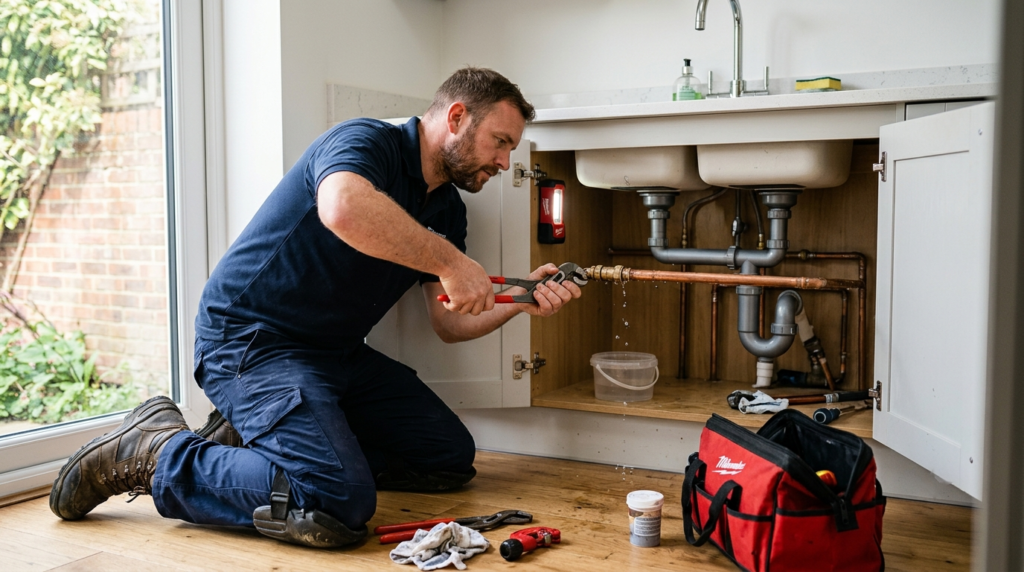
A leaking pipe rarely announces itself. It starts as a faint damp patch behind a cupboard or a slow drip you can hear at 2 am, and by the time most people notice it properly, water has already found its way into a wall, a floorboard, or a ceiling below. The good news is that a huge number of pipe leaks are fixable by hand, with a few basic tools and about half an hour of patience.
This guide walks through why pipes leak in the first place, how to spot one before it does real damage, and exactly how to repair copper, PVC, PEX, and galvanised steel pipework yourself, plus when a leak has crossed the line from “DIY job” to “call a plumber now.” Our team at Catalyst Home Services deals with pipe repairs across London every week, from a dripping joint under a kitchen sink to a burst supply pipe flooding a hallway, so most of what’s below comes from what actually works on site, not just theory.
How Do You Repair a Leaky Pipe?
A leaking pipe can usually be repaired by first shutting off the water supply, drying the damaged area, and applying the correct repair method for the pipe type. Small leaks may be temporarily fixed with repair tape, epoxy putty, or a repair clamp, while damaged or corroded pipes usually require replacing the affected section.
What To Do If You Have a Leaking Pipe Right Now
If you have discovered a leaking pipe, the first priority is stopping water damage before attempting any repair.
Follow these steps:
1. Turn Off the Water Supply
Locate your main stopcock and turn it clockwise until the water stops. In most UK homes, the stopcock is found under the kitchen sink, near the water meter, or where the mains water supply enters the property.
2. Drain Remaining Water
Open the nearest tap to release pressure from the pipe and allow trapped water to drain into a bucket.
3. Protect the Area
Place towels, containers, or protective sheets around the leak to prevent damage to floors, cupboards, and furniture.
4. Identify the Type of Leak
Check whether the leak is coming from:
- A pipe crack
- A loose joint
- A fitting connection
- A damaged appliance connection
Once the immediate leak is controlled, you can decide whether a temporary repair is suitable or whether professional pipe repair is required.
What Causes a Pipe to Leak?
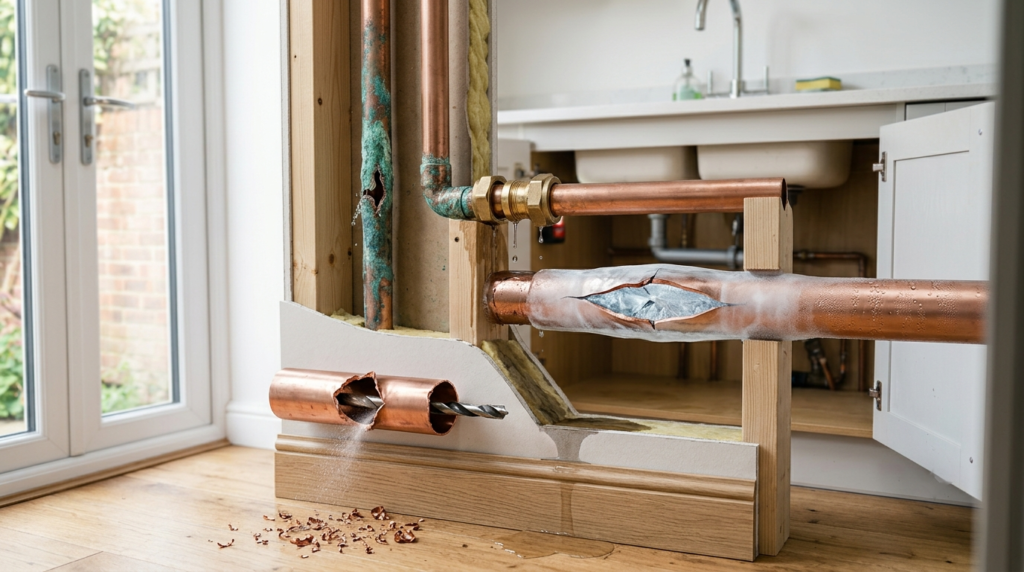
Pipes don’t fail for no reason. Almost every leak we’re called out to trace back to one of six causes, and knowing which one you’re dealing with changes how you fix it.
Corrosion
Metal pipes, copper, and especially older galvanised steel corrode from the inside out. Water reacts with the metal over years, thinning the pipe wall until a pinhole opens up. You’ll often see a small greenish or rust-coloured stain right at the leak point before the pipe actually starts weeping water. Corrosion is progressive, so a patch today doesn’t mean the pipe won’t fail somewhere else next year.
High Water Pressure
Mains pressure that’s too high puts constant strain on joints, seals, and fittings. If you notice more than one leak appearing around your property within a short space of time, pressure is worth ruling out before you start replacing parts one by one. Our water pressure issues team can test and regulate this properly if you suspect it’s the underlying problem.
Loose Pipe Joints
Compression fittings, push-fit connectors, and soldered joints can all loosen slightly over time as pipework expands and contracts with temperature changes. A joint that was perfectly tight when it was installed can start to weep years later without anything obviously wrong with the pipe itself.
Freezing Weather
Water expands as it freezes. In an unheated loft, garage, or exterior wall, a hard frost can split a pipe outright or crack a joint that only starts leaking once the ice thaws. This is one of the most common causes of sudden, dramatic leaks over a UK winter.
Physical Damage
Pipes get nicked by a drill through a wall, knocked during other building work, or crushed under something heavy in a loft or under-stairs cupboard. Physical damage tends to cause a leak immediately, or shortly after whatever caused it.
Worn-Out Seals
Rubber washers, O-rings, and gaskets inside fittings and appliance connections harden and crack with age. This is the usual culprit behind a leak at a tap base or a washing machine connector rather than the pipe run itself. Our tap and faucet repair page covers this in more detail if the drip is coming from the tap rather than the pipe behind it.
Signs You Have a Leaking Pipe
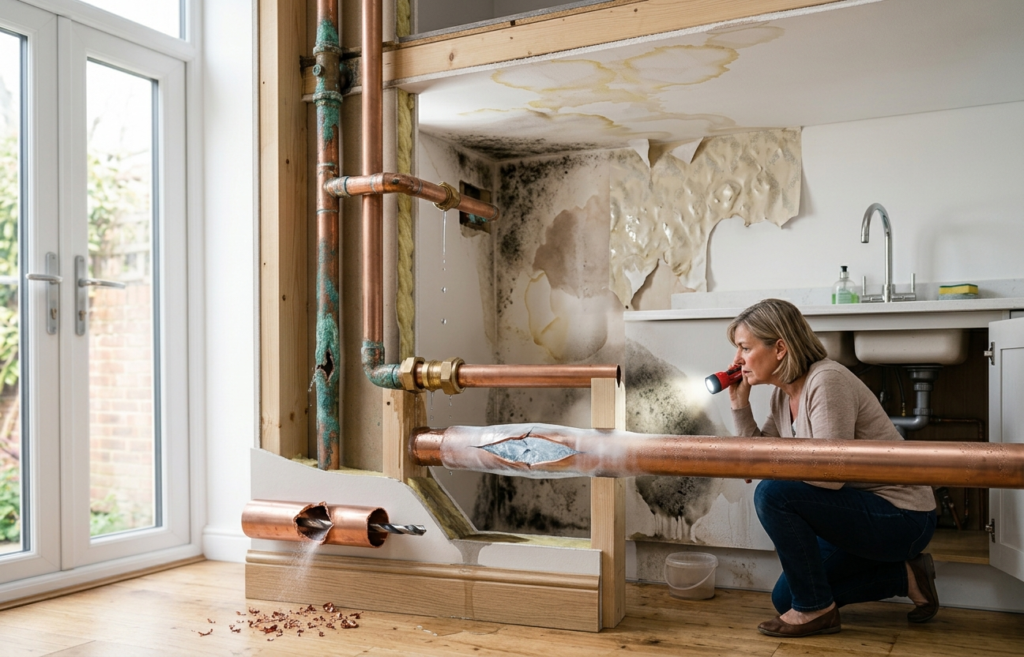
Some leaks are obvious. Most aren’t hidden behind plaster, under floors, or inside cavity walls, and show up as smaller clues first.
Water Stains
A yellowish-brown ring on a ceiling or wall is almost always water, even if it’s long dried out by the time you spot it. Don’t assume an old stain means an old, resolved problem; check it’s not still slowly growing.
Damp Walls
Plaster that feels cold and slightly soft to the touch, or wallpaper that’s started to bubble or peel, often points to a leak running behind it rather than rising damp from outside.
Low Water Pressure
If your shower or taps have noticeably weaker flow than they used to, and it’s happened gradually rather than overnight, a hidden leak elsewhere in the system can be siphoning off pressure before it reaches the tap.
Higher Water Bills
A metered water bill that’s crept up without any change in your household’s usage is one of the more reliable early warning signs, since a hidden leak can run for weeks before it becomes visible.
Mold Growth
Black or green mold in a spot that isn’t a bathroom or kitchen, the back of a wardrobe, a skirting board, or under a sink cabinet usually means there’s a moisture source nearby that shouldn’t be there.
Dripping Sounds
A faint tapping or trickling sound from inside a wall or under a floor, especially when no taps are running, is worth investigating immediately rather than waiting to see if it stops. For anything you can’t visually confirm, our leak detection and repair service uses proper detection equipment to find it without lifting floors or breaking through walls unnecessarily.
What You’ll Need Before Repairing a Leaky Pipe
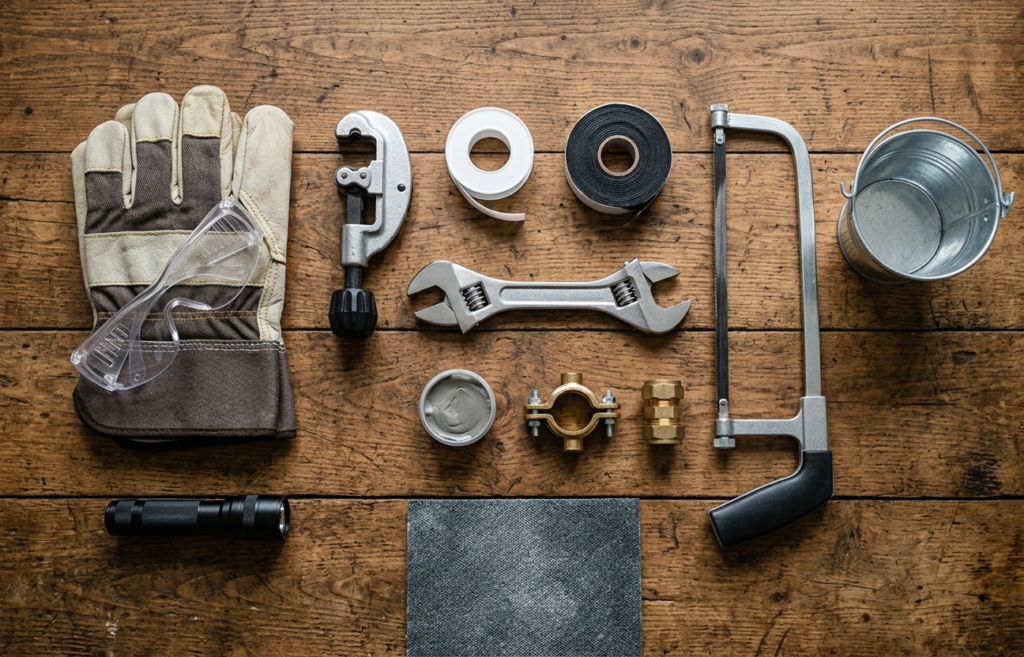
Having everything ready before you start saves you a soaked trip to the hardware shop halfway through the job.
Essential Tools
Adjustable spanner, pipe cutter or hacksaw, sandpaper or emery cloth, a torch, and a bucket or old towels for the water that’s already in the pipe.
Safety Equipment
Gloves, safety glasses if you’re cutting or filing metal pipe, and a torch if you’re working in a loft, under a sink cabinet, or anywhere with poor lighting.
Repair Materials
Pipe repair tape, epoxy putty, a repair clamp, or a compression coupling, depending on which method you choose in the steps below — plus PTFE tape for any threaded joints you disturb along the way.
Turn Off the Water Supply First
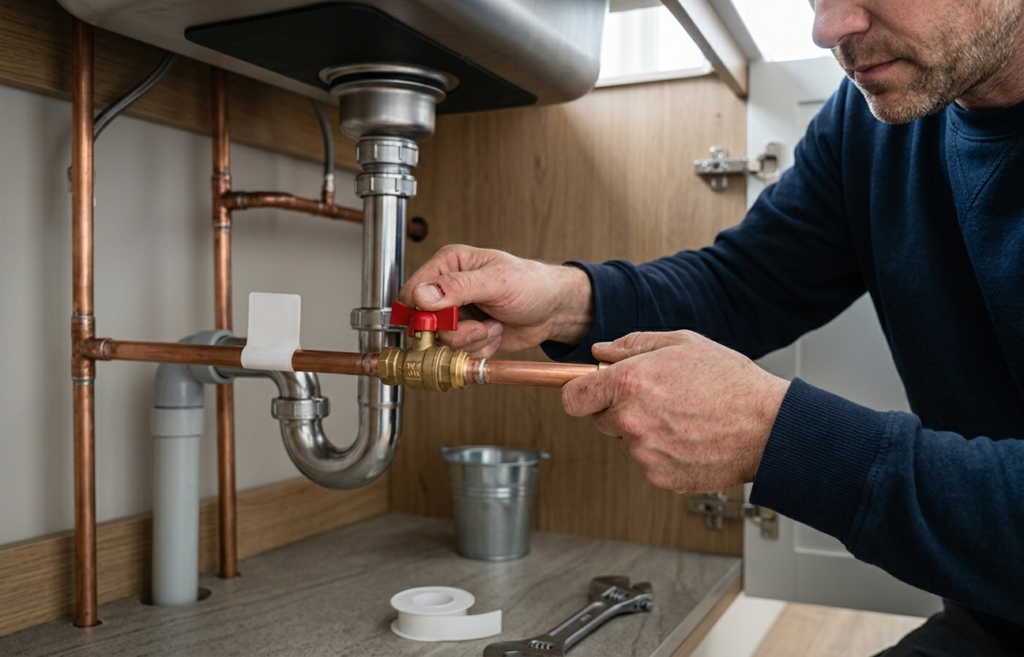
This step isn’t optional. Working on a pressurised pipe, even a small one, means you’ll be fighting a jet of water the whole time, and any repair you make won’t hold properly with water still moving through it.
Locate the Main Shut-Off Valve
In most UK homes, this is under the kitchen sink, near the water meter, or in a downstairs cupboard close to where the mains enters the property. It’s worth finding and testing this valve before you ever have an emergency, not during one.
Drain Remaining Water
Once the supply is off, open the lowest tap in the house and let it run until it stops, then open the tap nearest the leak to release any pressure trapped in that section of pipe. Have a bucket or towels ready underneath the leak itself, since some water will still be sitting in the pipe.
How to Repair Leaky Pipe (Step-by-Step)
Step 1 – Identify the Leak
Trace the leak back to its actual source rather than the spot where water is pooling, since water often travels along a pipe or joist before dripping somewhere visible. Dry the pipe with a towel and watch closely — sometimes it takes a minute or two under pressure for the exact point to show itself again.
Step 2 – Clean the Pipe
Wipe the area completely dry, then lightly sand it with emery cloth to remove any grease, corrosion, or old sealant. Every repair method below depends on the surface being clean and dry to bond or seal properly — skipping this step is the single most common reason a DIY repair fails within a few days.
Step 3 – Choose the Correct Repair Method
Pipe Repair Tape
A self-fusing silicone tape wrapped tightly around the leak, overlapping each layer by roughly half its width. It’s the fastest option and works well as a genuinely temporary fix, but it’s not designed to hold indefinitely under mains pressure.
Epoxy Putty
A two-part putty kneaded together until it activates, then pressed and moulded firmly around the leak by hand. It sets hard within a few minutes and holds up better than tape, particularly on small pinhole leaks in copper pipe.
Pipe Repair Clamp
A metal clamp with a rubber gasket that bolts directly around the pipe over the leak point. This is one of the sturdier temporary options and is often what a plumber will use as an interim fix before a full section replacement.
Compression Coupling
Cut out the damaged section of pipe and fit a compression coupling over the two clean ends. Done correctly, this is effectively a permanent repair rather than a stop-gap.
Replace the Damaged Section
For corrosion, splits, or repeated failures at the same spot, cutting out the affected length and fitting new pipe is the only repair that actually addresses the underlying problem rather than working around it. If a whole run of old pipework is showing multiple failure points, our pipe replacement and relining team can assess whether relining or full replacement makes more sense than patching each leak as it appears.
How to Repair Different Types of Pipes
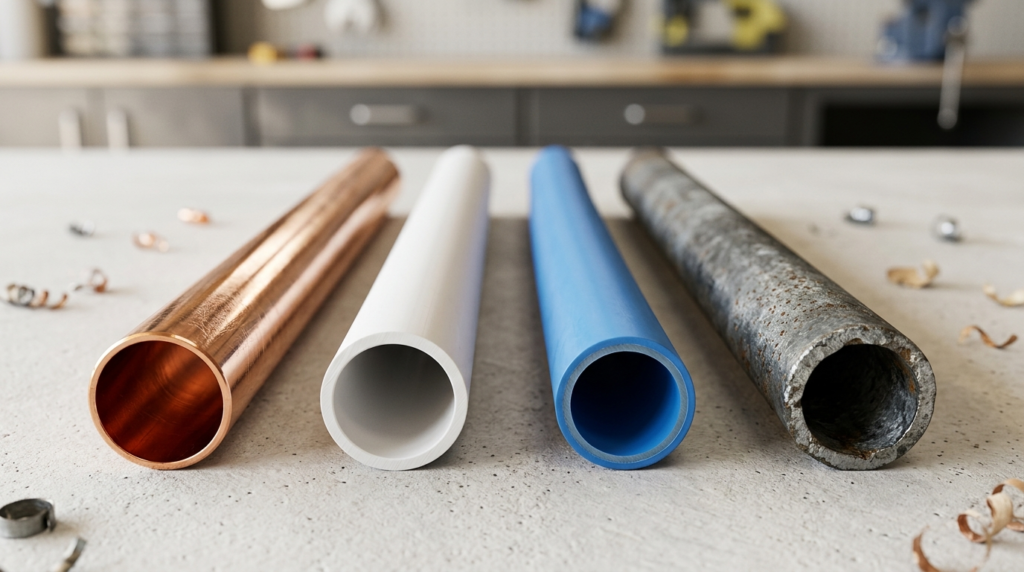
Not every repair method suits every material, and using the wrong one is how a lot of DIY fixes end up worse than the original leak.
Copper Pipe
Copper takes epoxy putty and repair clamps well, and can be soldered if you’re confident with a blowtorch. For anything beyond a small pinhole, a compression coupling is usually the more reliable route for a non-professional.
PVC Pipe
PVC bonds well with solvent cement designed specifically for PVC, but the pipe must be completely dry first — solvent cement won’t cure properly against any residual moisture. Repair tape and clamps also work as a temporary measure.
PEX Pipe
PEX is flexible and generally repaired with a push-fit or crimp coupling rather than tape or putty, since the pipe’s flexibility makes rigid repairs less reliable. This is the same push-fit principle used in Speedfit-style connectors — if you want to understand how these fittings actually work before attempting a repair, our Speedfit plumbing guide breaks down push-fit fittings in more detail.
Galvanised Steel Pipe
Galvanised steel is the trickiest of the four. It’s usually old, often corroded well beyond the visible leak point, and threaded joints can seize or crack further if you disturb them. A repair clamp is the safest DIY option; anything more than that is worth handing to a professional, since galvanised pipe has a habit of failing again nearby the moment you touch it.
Emergency Leaking Pipe: When You Should Call a Plumber
Not every leaking pipe can be safely repaired with a DIY solution. While small accessible leaks may be manageable with temporary repair materials, some situations require immediate professional attention to prevent serious water damage, structural problems, and costly repairs.
Knowing when to stop attempting a repair and call a qualified plumber can save you from turning a small leak into a major emergency.
Burst Pipe or Rapid Water Flow
A burst pipe is one of the most urgent plumbing problems because water can spread quickly and cause significant damage within minutes. If a pipe has split, cracked open, or is releasing a large amount of water, the first step is to turn off the main water supply immediately.
Do not spend time trying to apply tape, putty, or other temporary fixes while water is actively flooding the area. Once the supply has been isolated, contact a professional plumber to assess the damage, repair the pipe, and check whether surrounding pipework has also been affected.
Water Coming Through Ceilings or Walls
Water stains, dripping ceilings, damp patches, or water appearing from inside walls often indicate a hidden pipe leak. These leaks can be more serious than visible pipe damage because water may already have travelled through plaster, insulation, flooring, or electrical areas before becoming noticeable.
Avoid cutting into walls or ceilings unless you know exactly where the leak is located. Professional leak detection equipment can identify the source more accurately and reduce unnecessary damage during repairs.
Hidden Pipe Leaks
Some leaks are difficult to locate because the affected pipe is hidden behind walls, under floors, inside ceilings, or beneath kitchen units. Signs of a hidden leak may include:
- Unexplained increases in water bills
- Damp smells
- Mould growth
- Peeling paint or wallpaper
- Reduced water pressure
- Sounds of running water when taps are turned off
A hidden leak that remains untreated can gradually damage building materials and create ideal conditions for mould growth. If you suspect a concealed pipe leak, professional inspection is usually the safest approach.
Multiple Leaks Around Your Property
If several pipes, joints, or fittings begin leaking within a short period, the problem may not be limited to one damaged section. Multiple leaks can indicate ageing pipework, excessive water pressure, corrosion, or a wider plumbing system issue.
Replacing one leaking point without identifying the underlying cause may only provide a temporary solution. A plumber can inspect the system and recommend whether targeted repairs or larger-scale pipe replacement would be more cost-effective.
You Cannot Isolate the Water Supply
Before carrying out any pipe repair, you need to stop the flow of water. If the main stopcock is stuck, damaged, missing, or fails to shut off the supply completely, attempting a repair can become risky.
A faulty isolation valve or stopcock can leave you unable to control the leak, increasing the chance of water damage. In this situation, contact a plumber to safely isolate the supply and repair the faulty valve before dealing with the leaking pipe.
When DIY Repair Is Not Worth the Risk
A DIY repair may be suitable for a small, visible leak on accessible pipework, but professional help is recommended when:
- The pipe has burst or split
- The leak is behind a wall, ceiling, or floor
- The pipe is heavily corroded
- The same pipe keeps leaking after repairs
- You cannot identify the leak source
- The water supply cannot be shut off safely
- The leak is causing structural damage
A quick professional repair can often prevent much larger costs caused by water damage, mould growth, damaged flooring, or repeated failed repairs.
If you are dealing with a leaking pipe emergency anywhere in London, Catalyst Home Services can help identify the cause, stop the leak, and provide a reliable repair solution before the problem gets worse.
Temporary vs Permanent Pipe Repairs
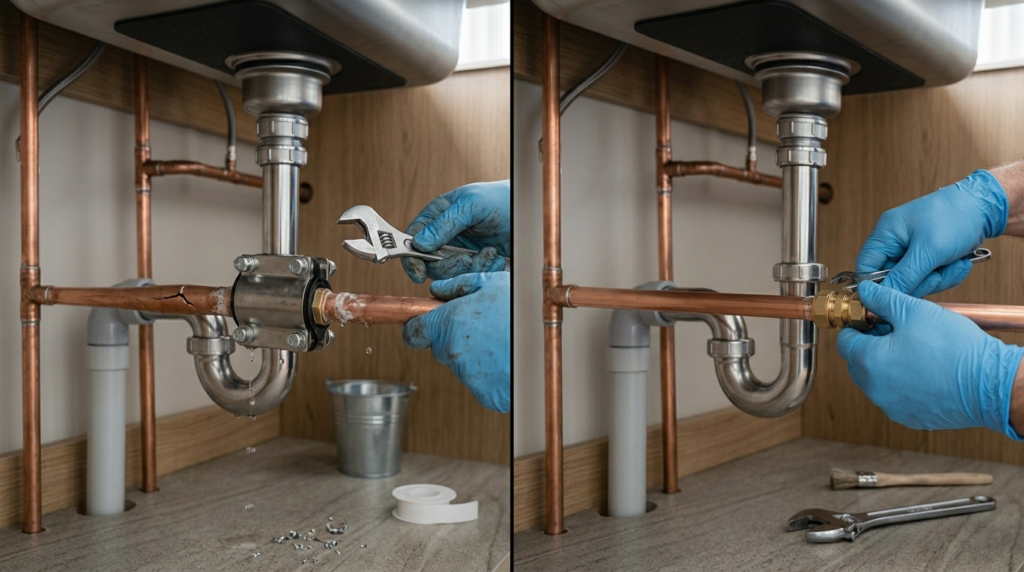
Temporary Repairs
Pipe repair tape and, to a lesser extent, epoxy putty and clamps are designed to buy you time — hours to a few days — until you can either complete a proper repair or get a plumber out. Treat anything temporary as exactly that, and don’t forget about it once the immediate drip has stopped.
Permanent Repairs
Compression couplings and full section replacement are the only methods that genuinely resolve the leak rather than containing it. If you’re unsure which category your repair falls into, assume it’s temporary and plan to revisit it.
Common DIY Mistakes to Avoid
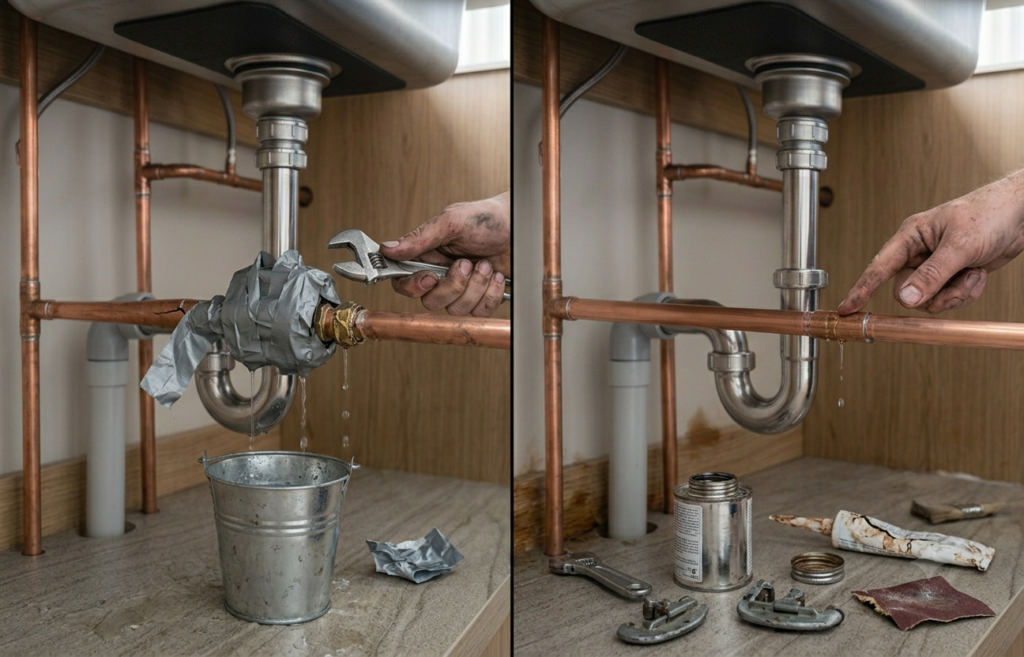
Ignoring Small Leaks
A pinhole leak that’s “not that bad” today is often much bigger in a few weeks, especially with corrosion-related failures that continue to eat through the pipe wall.
Using the Wrong Materials
Standard electrical or duct tape isn’t designed for water pressure and will fail quickly. Use products actually rated for plumbing repairs, even for a short-term fix.
Skipping Surface Preparation
Any repair applied to a wet, greasy, or corroded surface will hold for a few hours at best. This is worth repeating because it’s the most common reason we get called out to a “fixed” leak that’s started again.
Over-Tightening Fittings
More torque doesn’t mean a better seal. Over-tightening a compression fitting or clamp can crack the pipe or deform the gasket, causing a new leak rather than solving the original one.
When Should You Call a Professional Plumber?
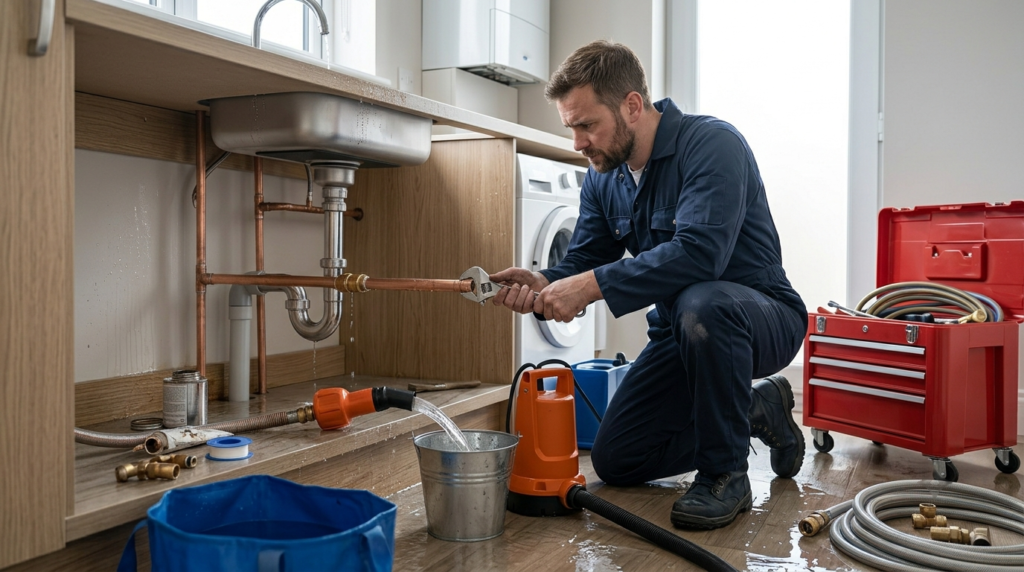
DIY repairs have their place, but some situations call for a professional straightaway rather than after a failed attempt.
Burst Pipes
A burst pipe releases water fast enough to cause serious damage within minutes. Shut off the water supply immediately and call our burst pipe repair team, or the 24/7 emergency plumbing line if it happens outside normal hours.
Hidden Leaks
If you can’t see or reach the leak — behind a wall, under a solid floor, or beneath a foundation — proper detection equipment is the only reliable way to find it without unnecessary demolition.
Multiple Leaks
Several leaks appearing across different parts of the system usually point to a wider issue, such as pressure or ageing pipework, that a single repair won’t solve.
Structural Damage
Any leak that’s already caused sagging ceilings, warped flooring, or damage to structural timber needs a professional assessment of both the plumbing and the building fabric.
Repeated Pipe Failures
If the same section keeps leaking after repair, the pipe itself has reached the end of its working life and needs replacing rather than patching again. If you’re anywhere across North London and dealing with recurring pipework issues, our North London plumbing team can take a proper look at the wider system.
How Much Does Pipe Repair Cost in the UK?
DIY Repair Costs
Pipe repair tape, epoxy putty, and clamps typically cost between £5 and £25, making DIY the cheapest route for a small, accessible leak.
Professional Repair Costs
A straightforward professional pipe repair in London generally runs from around £80 to £250, depending on access, pipe material, and whether the leak is visible or needs detection work first. For an accurate quote for your situation, you can book a plumber directly and get a clear price before any work starts.
Pipe Replacement Costs
Replacing a full section or run of pipework costs more — often several hundred pounds upward — depending on length, material, and how much disruption is needed to access it, such as lifting floorboards or opening a wall.
How to Prevent Future Pipe Leaks
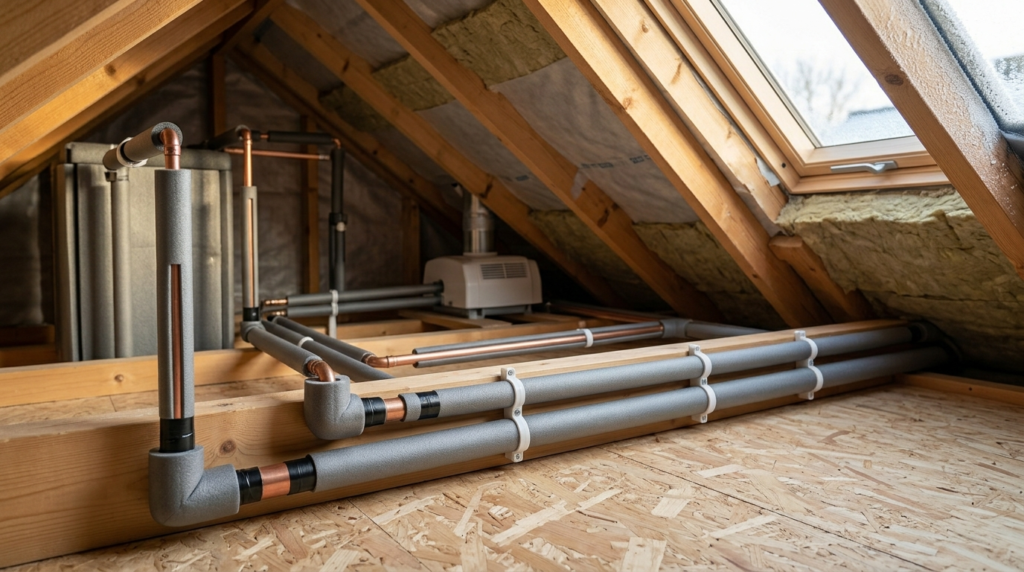
Regular Inspections
Check accessible pipework — under sinks, in the loft, near the stopcock — every few months for early signs of corrosion, damp, or loose joints, before they turn into an actual leak.
Insulate Pipes
Pipe insulation in lofts, garages, and exterior walls is one of the cheapest ways to prevent freeze-related bursts over winter, and it pays for itself the first cold snap it prevents damage from.
Monitor Water Pressure
If you’ve had more than one leak in a short period, get your mains pressure checked rather than assuming it’s a coincidence.
Replace Aging Pipes
Galvanised steel pipework installed decades ago is usually past the point where repairs make sense. Replacing it proactively is often cheaper in the long run than repeated emergency call-outs.
Annual Plumbing Maintenance
A yearly check from a qualified plumber catches the small issues before they become emergencies. Our annual maintenance contracts are built around exactly this, with scheduled inspections that flag developing problems early.
Final Thoughts
Most pipe leaks are manageable with the right tools, a bit of patience, and the correct repair method for the pipe you’re dealing with. Where DIY genuinely falls short is anything hidden, structural, or repeat-failing — and in those cases, getting a professional in early is almost always cheaper than the damage caused by waiting. If you’re dealing with a leak anywhere in London and want it looked at properly, get in touch with Catalyst Home Services, and we’ll take it from there.
FAQs
How can I prevent pipes from leaking in the future?
Regular plumbing maintenance is the best way to reduce the risk of leaks. Check visible pipes for signs of corrosion, insulate pipes during winter, avoid excessive water pressure, repair small leaks promptly, and schedule periodic inspections if your plumbing system is older.
How do I repair a leaky pipe at home?
The first step is to turn off the main water supply to prevent further leaking. Dry the damaged area, identify the exact location of the leak, and choose the most suitable repair method. Small leaks can often be fixed temporarily with pipe repair tape, epoxy putty, or a repair clamp. If the pipe is badly corroded, cracked, or leaking at multiple points, replacing the damaged section is usually the safest long-term solution.
Can I repair a leaking pipe without replacing it?
Yes. Many minor leaks can be repaired without replacing the entire pipe. Temporary solutions such as epoxy putty, pipe repair tape, or repair clamps can stop water from escaping until a permanent repair is completed. However, if the pipe is old, heavily corroded, or repeatedly leaking, replacement is generally the better investment.
What is the best way to stop a leaking pipe quickly?
If you need an immediate solution, shut off the water supply and apply a pipe repair clamp or waterproof repair tape over the leak. These methods can quickly reduce or stop water loss until a permanent repair can be carried out. Avoid leaving temporary repairs in place for extended periods, especially on high-pressure water lines.
What causes water pipes to leak?
Pipes can leak for many reasons, including corrosion, worn-out joints, freezing temperatures, excessive water pressure, accidental damage, poor installation, and normal wear over time. Identifying the root cause is important because simply repairing the visible leak may not prevent future plumbing problems.
Is pipe repair tape a permanent solution?
No. Pipe repair tape is designed as a temporary emergency repair. While it can effectively stop small leaks for a short period, it should not replace a proper repair or pipe replacement. Permanent repairs usually involve replacing the damaged section or installing a new fitting.
Does epoxy putty permanently fix a leaking pipe?
Epoxy putty can provide a durable repair for small cracks and pinhole leaks when applied correctly to a clean, dry surface. However, it is not suitable for every situation. Pipes with severe corrosion, large cracks, or structural damage should be professionally repaired or replaced.
Can I repair a leaking copper pipe myself?
Yes, many homeowners can repair minor copper pipe leaks using repair clamps, epoxy putty, or compression fittings. For permanent repairs, soldering or replacing the damaged section may be required. If you are unfamiliar with plumbing work or soldering techniques, hiring a qualified plumber is recommended.
How do I repair a leaking PVC pipe?
Small PVC pipe leaks can often be repaired using PVC repair epoxy or a repair coupling. If the crack is significant or the joint has failed, replacing the damaged section of pipe and reconnecting it with new fittings and PVC cement usually provides the most reliable long-term repair.
Should I turn off the water before repairing a pipe?
Yes. Always turn off the main water supply before beginning any pipe repair. This prevents additional water damage, makes the repair safer, and allows repair materials such as epoxy or tape to bond properly to the pipe.
How Do I Stop a Leaking Pipe Immediately?
The first step to stop a leaking pipe is to turn off the water supply as quickly as possible. Locate your main stopcock and turn it clockwise until the water stops flowing. In most UK homes, the stopcock is usually found under the kitchen sink, near the water meter, or close to where the mains water pipe enters the property.
Once the water is isolated, open a nearby tap to release any remaining pressure inside the pipe. Place towels, a bucket, or containers under the leak to catch trapped water and reduce damage to surrounding areas.
For a small visible leak, you may be able to apply a temporary repair using pipe repair tape, epoxy putty, or a repair clamp. However, these solutions are only designed to reduce water loss until a permanent repair can be completed.
If the pipe has burst, the leak is hidden behind a wall or ceiling, or you cannot stop the water supply, contact a professional plumber immediately to prevent further damage.
Can I Temporarily Fix a Leaking Pipe?
Yes, some small pipe leaks can be temporarily controlled using products such as self-fusing repair tape, epoxy putty, or pipe repair clamps. These solutions can help reduce leaking and give you time to arrange a permanent repair.
However, temporary fixes should not be treated as a long-term solution. Repair tape and putty may eventually fail, especially on pressurised water pipes or pipes affected by corrosion.
A permanent repair usually involves replacing the damaged section of pipe, repairing the faulty joint, or installing new fittings depending on the cause of the leak.
If the same area continues leaking after a temporary repair, it usually indicates that the pipe or connection has a deeper problem that needs professional attention.
How Much Does It Cost to Repair a Leaking Pipe in the UK?
The cost to repair a leaking pipe in the UK depends on the location of the leak, the type of pipe, accessibility, and whether the damaged section needs replacing.
A simple repair on an exposed pipe, such as under a sink or near an appliance, may be relatively straightforward and usually costs less than repairing a hidden leak behind walls or flooring.
Typical factors that affect the final cost include:
- Whether the leak is visible or requires detection equipment
- The pipe material, such as copper, PVC, PEX, or galvanised steel
- Whether fittings or valves also need replacing
- Emergency call-out requirements
- The amount of damage caused by the leak
A small repair may cost around £80 to £250, while larger repairs involving pipe replacement, access work, or water damage restoration can cost significantly more.
The best way to understand the actual cost is to have the leak inspected so the correct repair can be recommended before work begins.
Should I Repair or Replace a Leaking Pipe?
Whether a leaking pipe should be repaired or replaced depends on the condition of the pipe and the reason it failed.
A repair may be suitable when:
- The leak is caused by a loose fitting or connection
- The pipe is otherwise in good condition
- The damage is small and easily accessible
- The issue is limited to one area
Replacement is usually the better option when:
- The pipe is heavily corroded
- The same section keeps leaking repeatedly
- There are multiple weak points along the pipe
- The pipe has cracked or split
- The pipework is old and reaching the end of its useful life
Repairing an ageing pipe repeatedly can become more expensive over time than replacing the affected section properly. A plumber can assess whether a repair will provide a reliable solution or whether replacement would prevent future problems.
Why Does My Pipe Keep Leaking After Repair?
A pipe may continue leaking after repair if the original cause of the problem was not fully addressed. Fixing the visible drip does not always solve the underlying issue.
Common reasons a repaired pipe may leak again include:
- The pipe is damaged beyond the original repair area
- A worn fitting or seal was not replaced
- The repair material was applied incorrectly
- The pipe has excessive water pressure
- Corrosion has weakened the surrounding pipework
- The wrong repair method was used for the pipe material
For example, applying repair tape to an old corroded pipe may temporarily stop water escaping, but the pipe can continue weakening and fail again nearby.
If a leak returns after repair, it is usually better to investigate the wider plumbing system rather than repeatedly patching the same area.